I think you’ll agree with me when I say it’s EXTREMELY important to track everything you can in a marketing campaign.
Especially if you are running pay per call campaigns.
Post Bonus: Get 45% OFF Web Hosting Perfect For OpenXBX
But many of the call tracking tools out there today are either confusing or expensive….
Or are they?
In today’s post and video, I’m going to show you exactly how you can install and get started using a free open sourced call tracker called Open VBX.
As I mentioned I personally like to use CallRail, currently for my call tracking needs, however, I wanted to make you aware of your other options.
One of those options is – OpenVBX made by Twilio.
Post Bonus: Get 45% OFF Web Hosting Perfect For OpenXBX
Open VBX is a free IVR (Interactive Voice Response) pay per call tracking tool by Twilio and is self-hosted.
Although the tool is free, you will still need to purchase local or 1-800 phone numbers to be able to use this service.
The other requirement you will need is your own web hosting account to install and host the software.
If you do not have a web host yet, I highly recommend you visit NameHero.com and purchase a hosting account to get started.
It is extremely cheap and powerful enough to use with Open VBX.
Make sure your web hosting account is setup for MySQL 5+ and PHP 5.2+ as stated under the requirements.
If you used NameHero.com then it should not be a problem.
If you used another host, you should be able to contact your web host support by sending them a ticket to get setup for what you need if it isn’t already.
Once your web hosting is setup, download OpenVBX from Github
Once the file is downloaded, you will then need to unzip the files.
Open up your FTP client and log in to your web hosting FTP account (FTP credentials can be found at your web hosting provider).
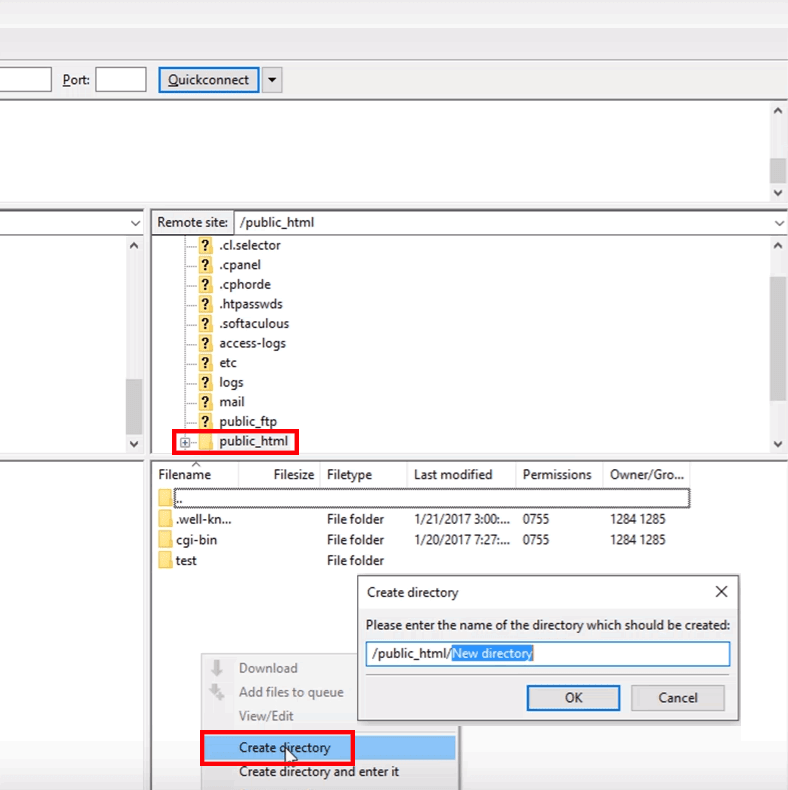
Once logged in to your FTP account, go into your public_html directory, right-click inside the directory and click create a directory from the drop-down menu.
Change New directory name to openvbx then click ok.

Take the files you unzipped and drag them over into the new openvbx folder.
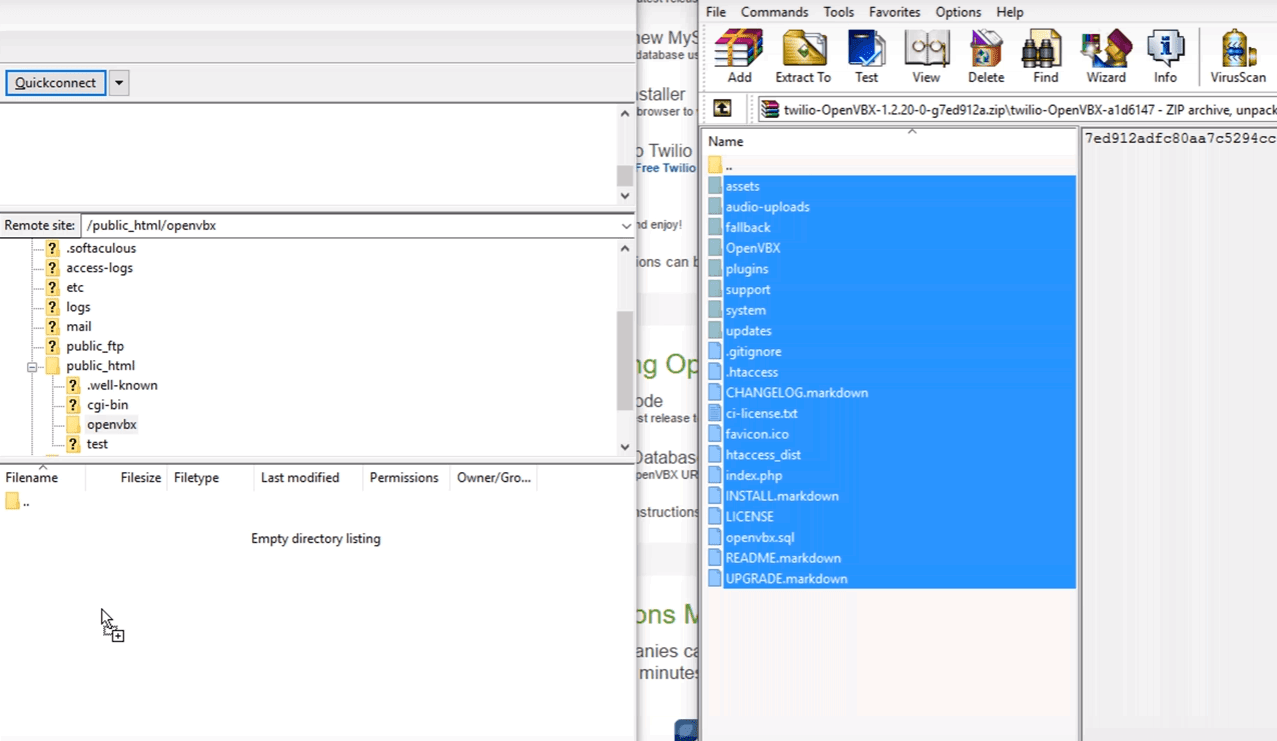
Once all the files have been uploaded successfully to the web server, you will then need to visit the domain name that your web hosting is connected to.
Example: http://www.yourdomainname.com/openvbx
If everything uploaded correctly, you should see the following:
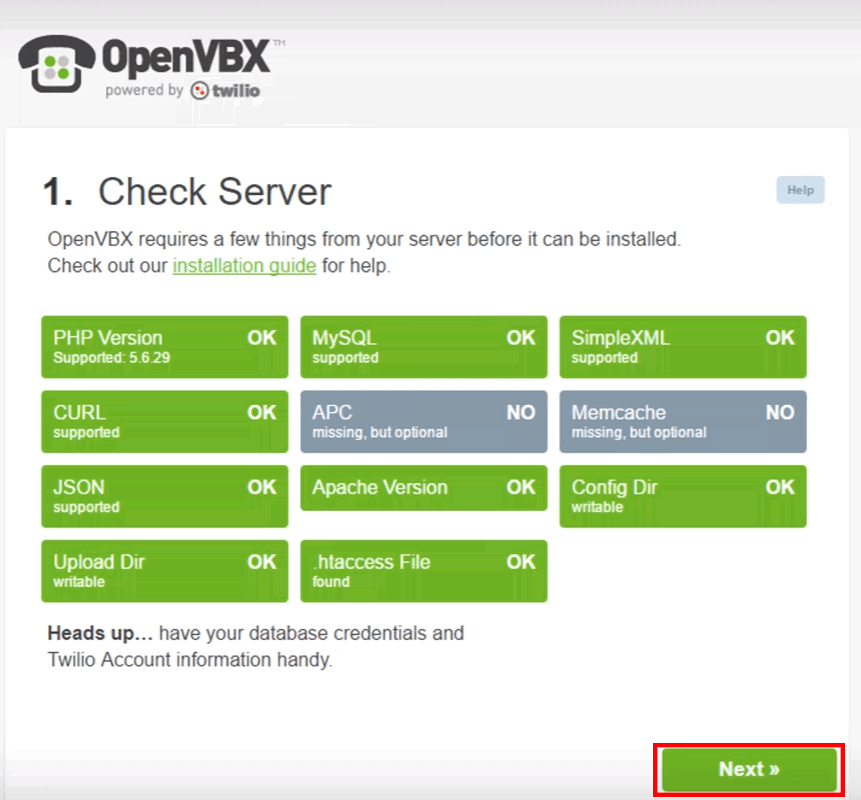
Click Next.
This is where you will need to open a new browser window and login to your CPanel account at your hosting provider and setup your MySQL database.
This is where the data for openvbx will be stored.
Once you are logged into your CPanel account, click on MySQL Database Wizard
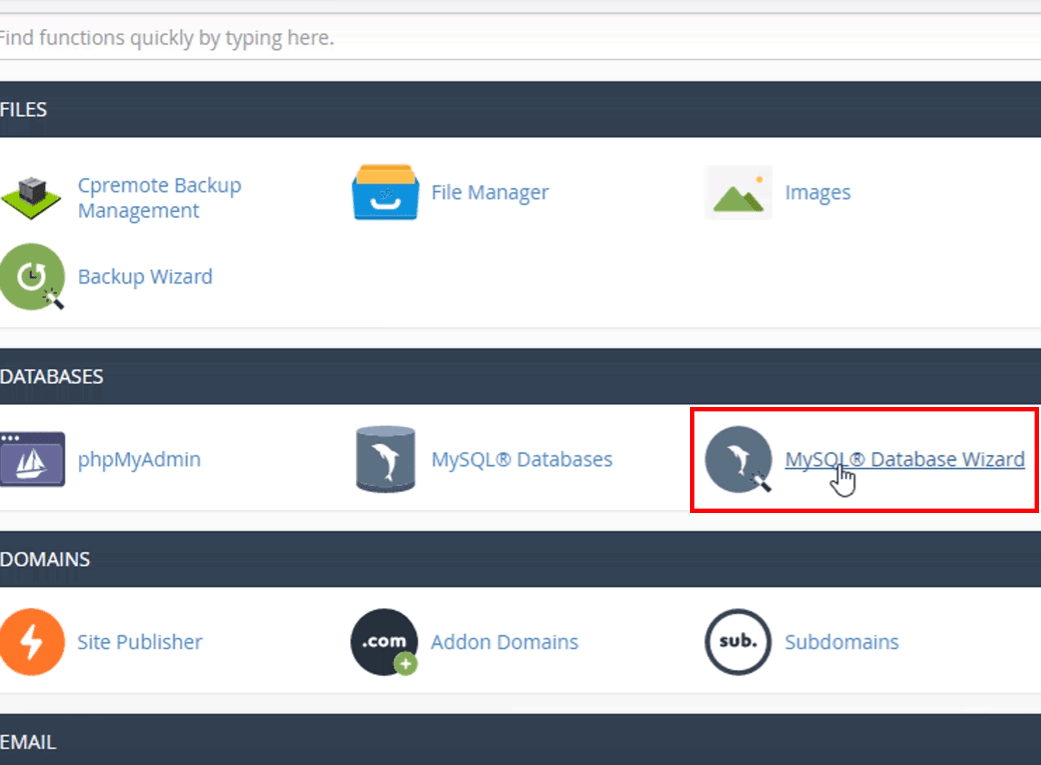
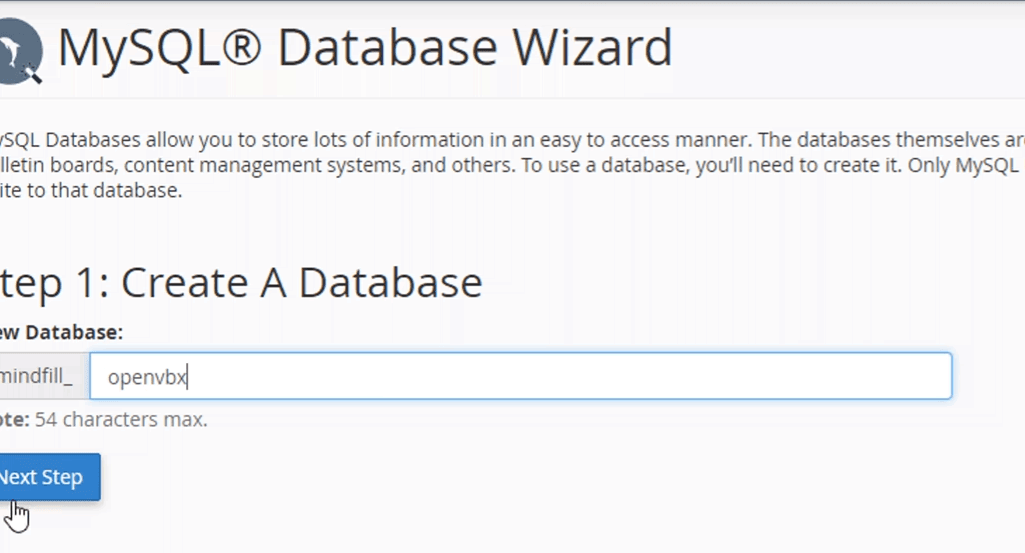
Type in openvbx as the name of your new database. Then click next.
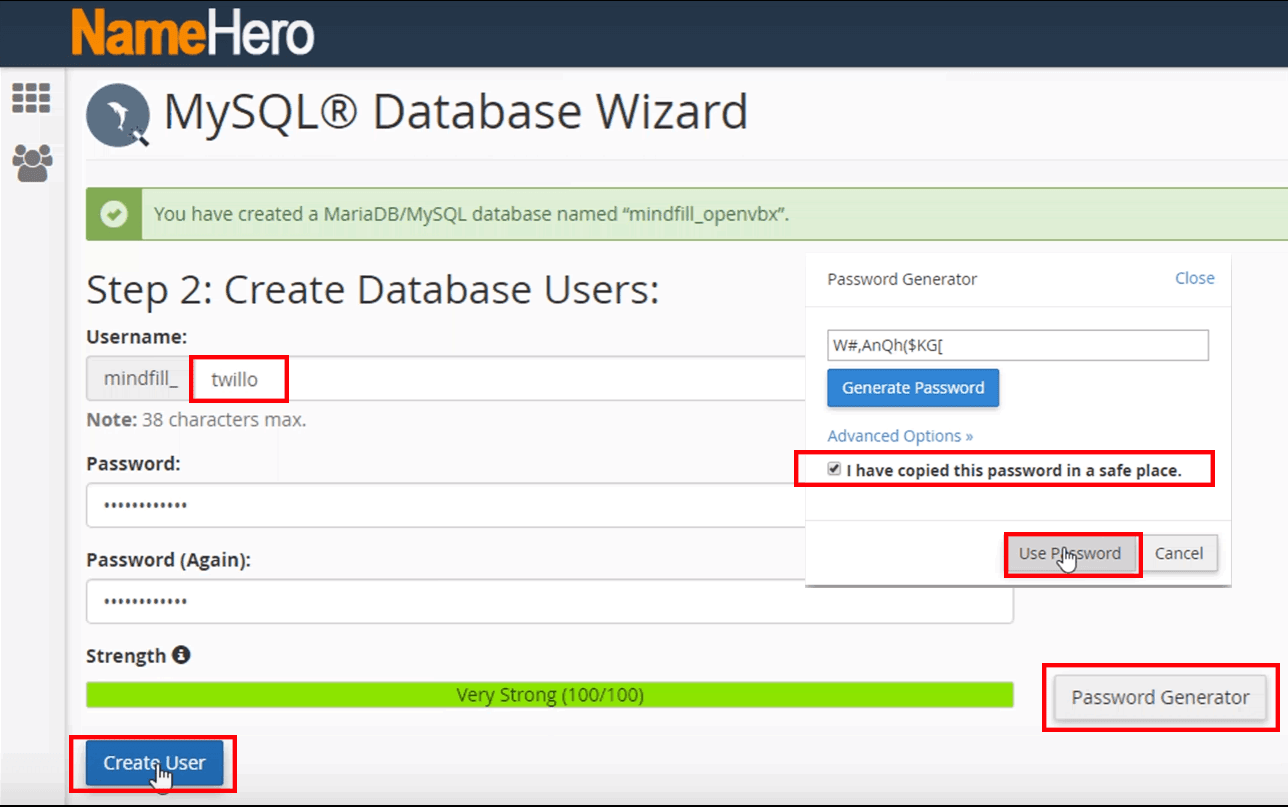
Type in your desired username then click Password Generator, then check the box, “I have copied this password in a safe place.”
Click Use Password then Create User.
Check the box ALL PRIVILEGES then click Next at the bottom.

The user has now been added to the database.
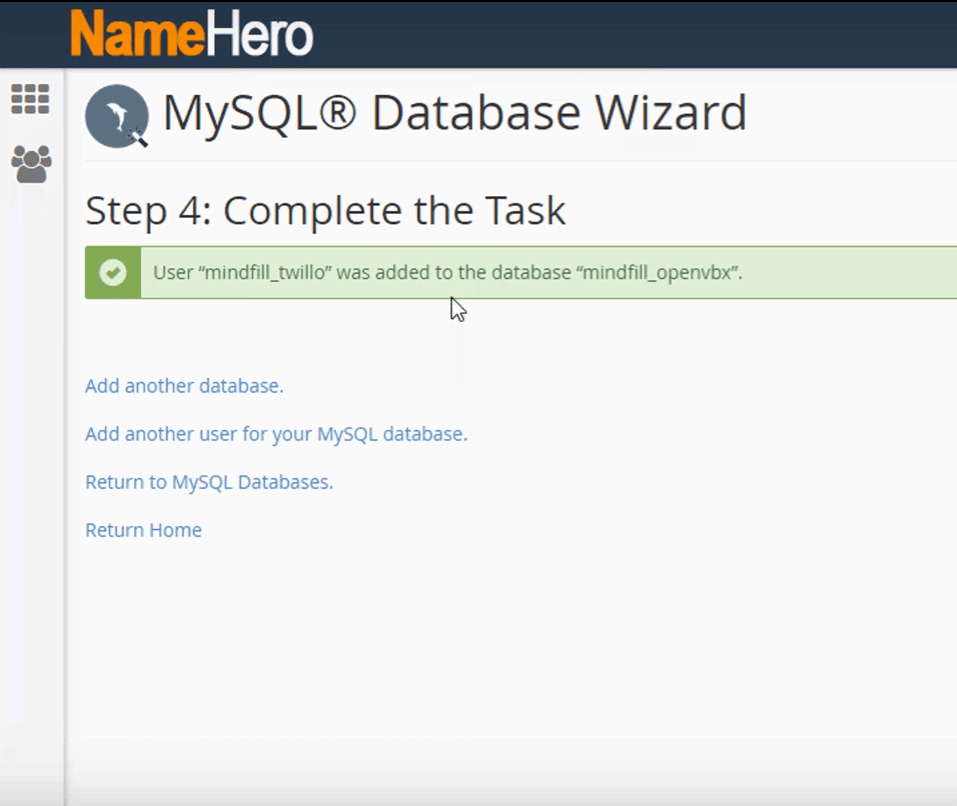
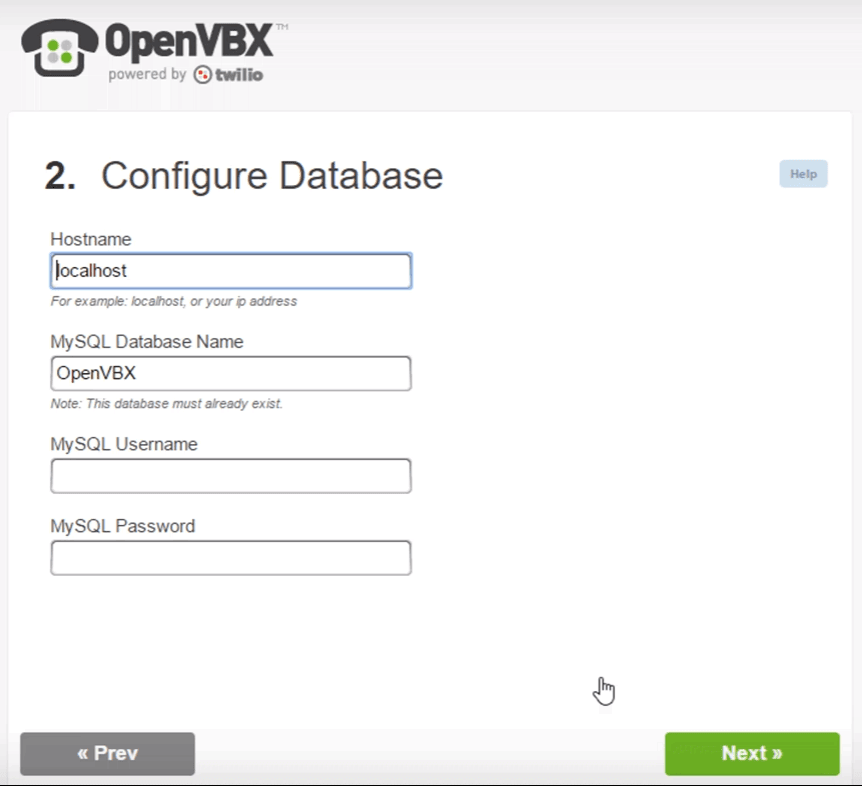
Return to OpenVBX Configure Database window.
Enter your database credentials including your SQL Database Name, MySQL Username, and the Generated Password. Click Next.
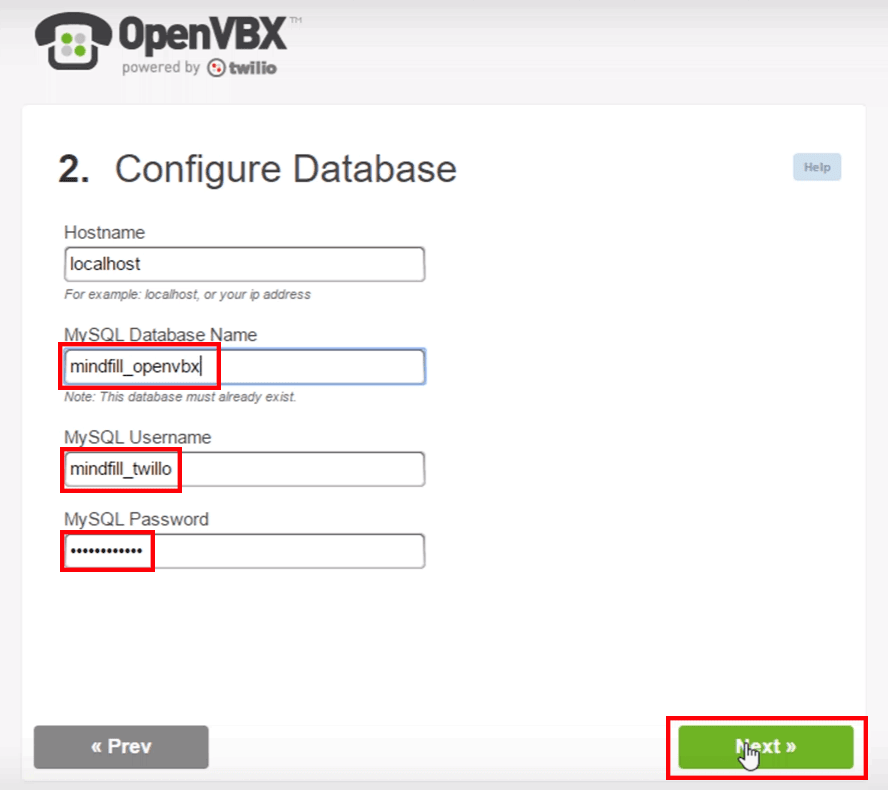
Now, it’s time to setup Twilio.
Click on your dashboard.
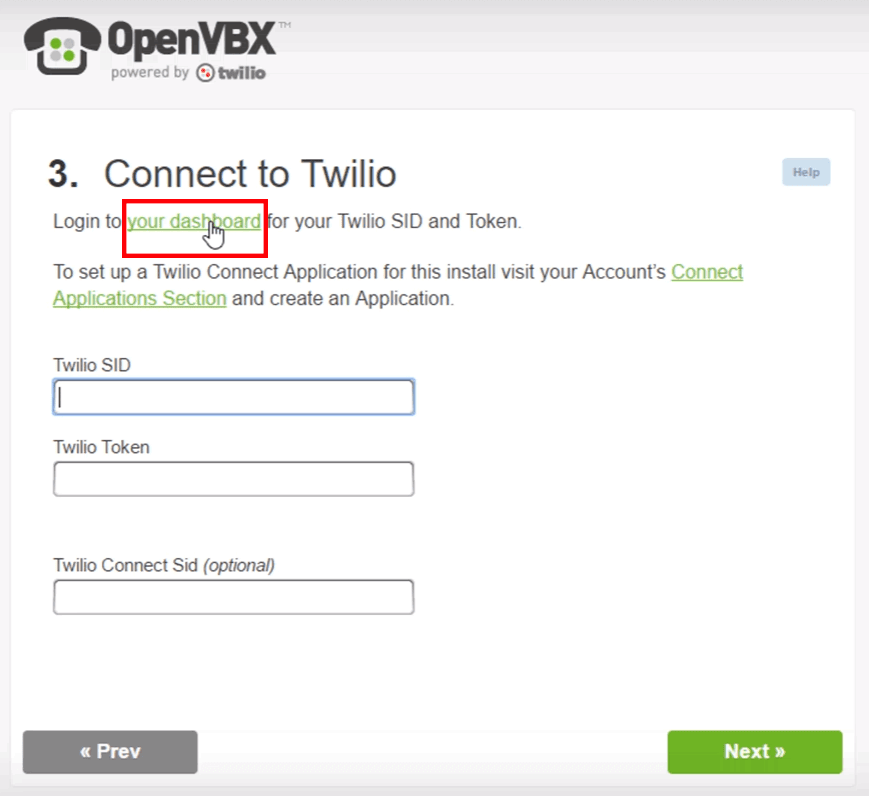
You will now be on Twilio login screen. If you have not setup Twilio yet, go ahead and click the Sign-Up button.

Go through the steps to finish setting up Twilio then once you are finished, log in with your E-mail and Password.
Once you are logged in, click Show API Credentials at the top right.

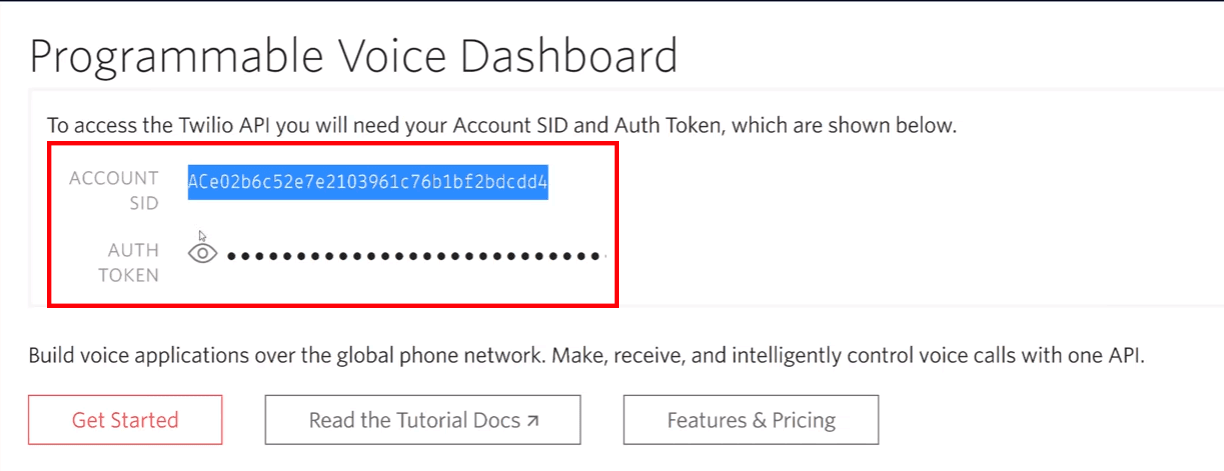
Copy your ACCOUNT SID and AUTH TOKEN into the Connect to Twilio window.
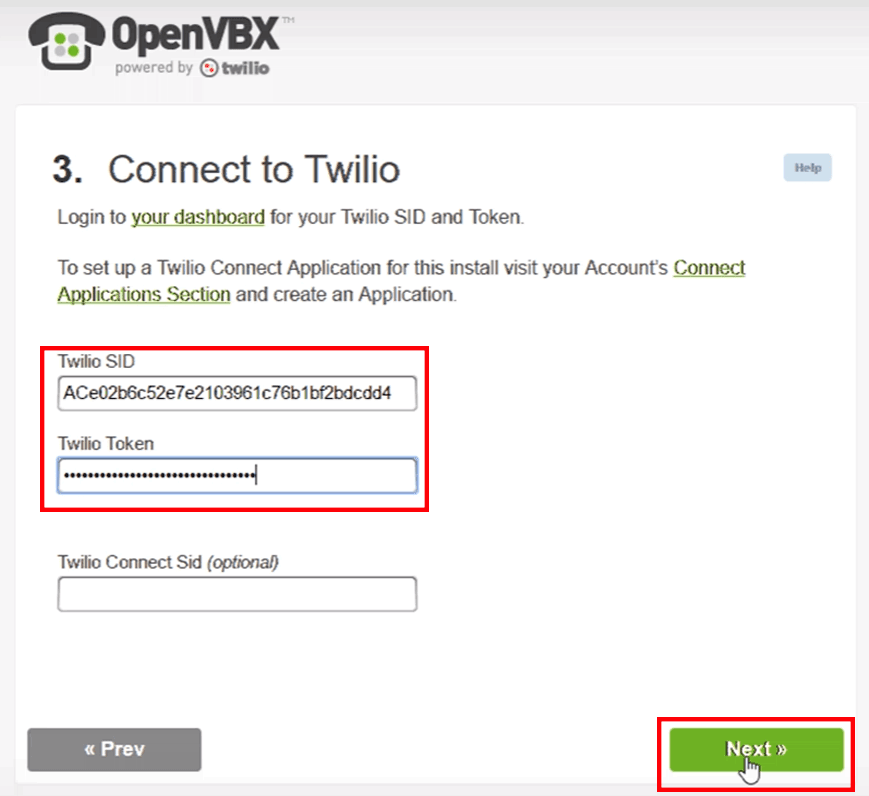
Type in the E-mail where you want OpenVBX to send its notifications. Then click Next.
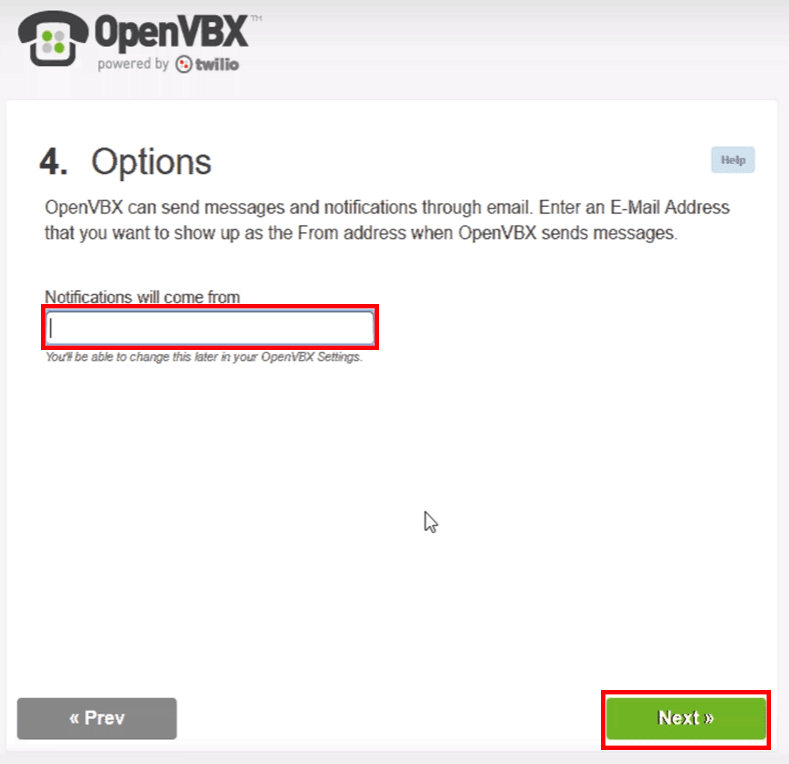
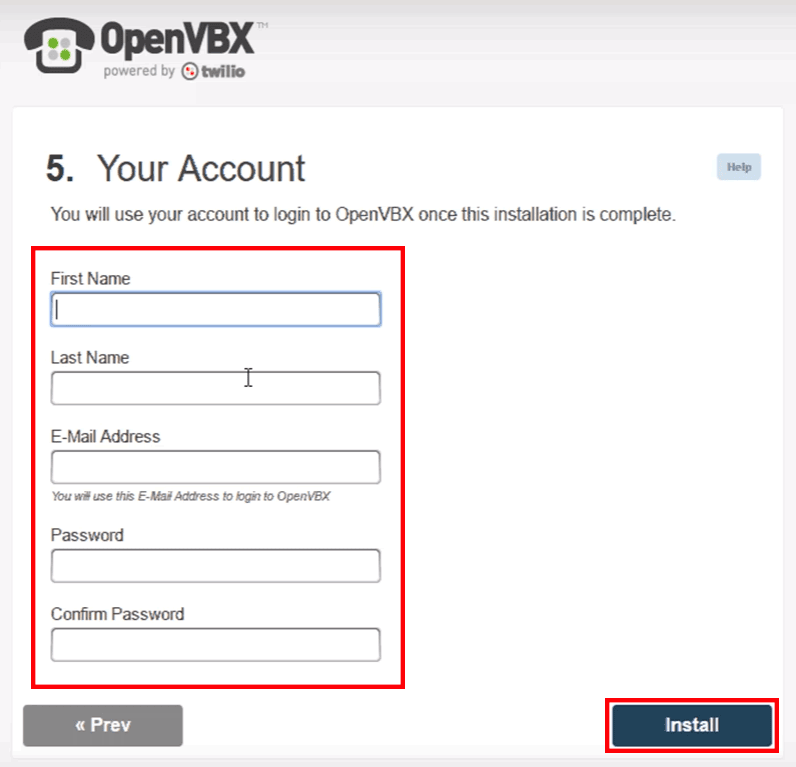
Now, it’s time to create your OpenVBX account information which will allow you to login to your OpenVBX account.
Enter your details then click Install.
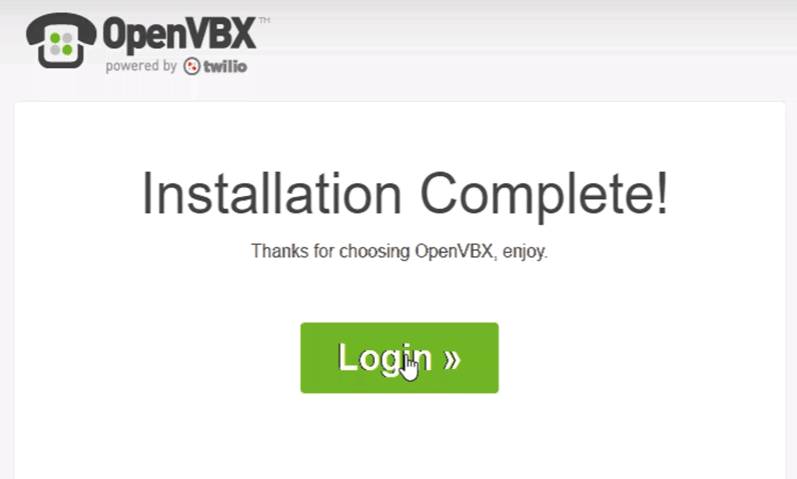
Now, that the installation is complete, click the Login button.
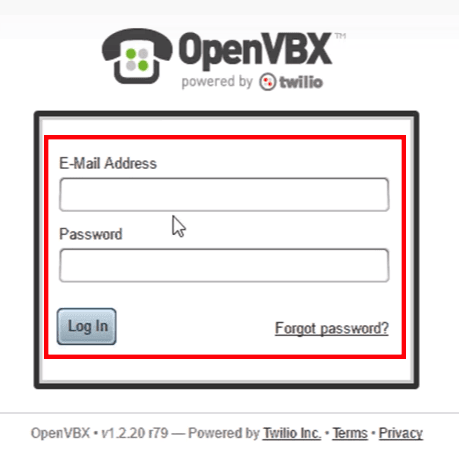
Enter your OpenVBX login details then click Log In.
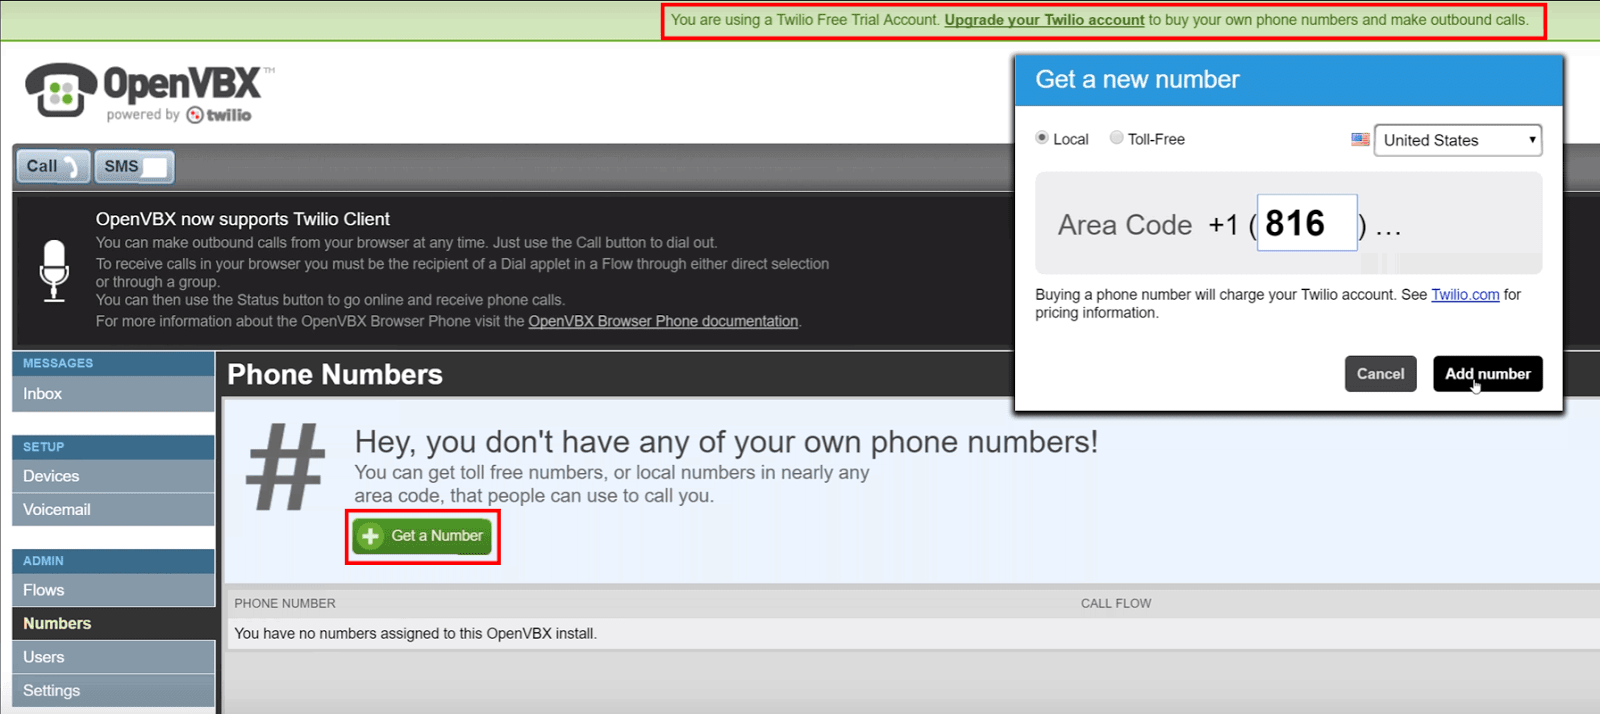
Once you are logged in, you will notice a green alert at the top showing that you currently have a free Twilio account and will need to upgrade your account in order to buy your own phone numbers and make outbound calls.
Once you add your billing details to your Twilio account, you can then click the green Get a Number button and choose a Local or Toll-Free number.
You may then choose your desired area code, then click Add number and it will generate a local or toll-free phone number for you to use.
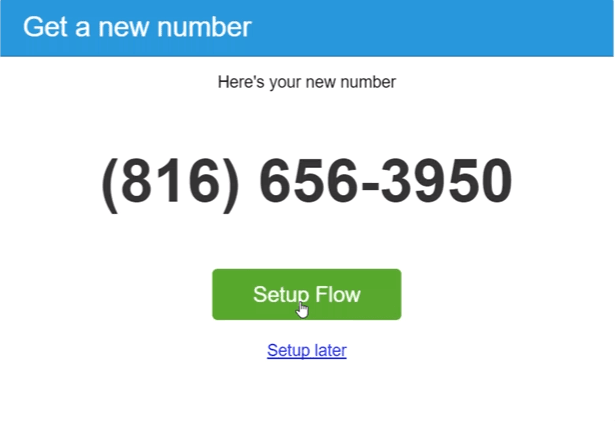
Once your phone number has been generated, you can then click Setup Flow which allows you to setup a call flow.
A call flow is how you want OpenVBX to handle the call once a customer has called the number.
If you want your new number to forward to another existing number, you can then drag the dial icon into the Call Start box on the left.
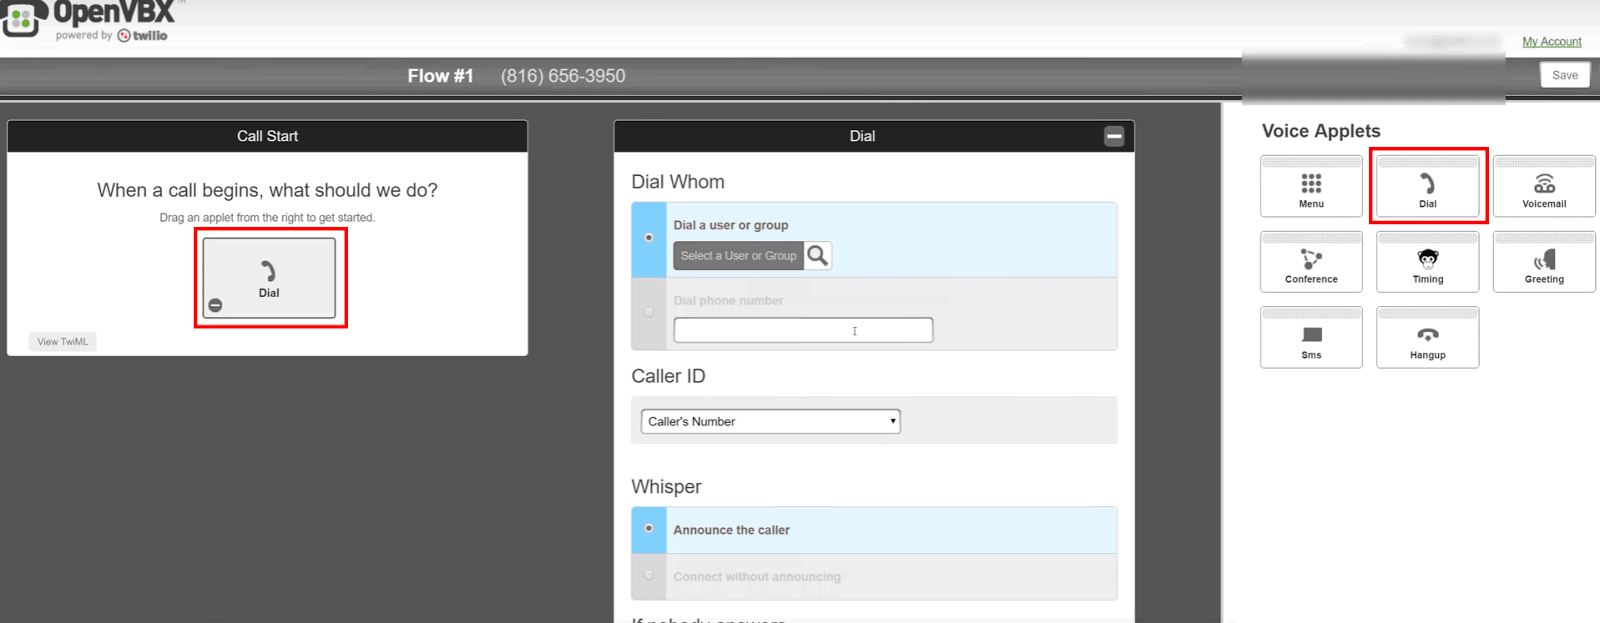
The number you are forwarding to will go in the Dial Whom box.
The Caller ID box is the number you want to see when you are being called. (Ie. the dial phone number).
The caller id number you choose depends upon your preference.
You may choose to see the number of the person who is calling you or the actual number the caller dialed, in this case the 816-656-3950 number.
The reason you may want to see the number that the caller dialed is so you can track where the number originated from.
For example, if you posted an ad on a billboard with the contact number as 816-656-3950 on Liberty Street, you will then know that the caller saw your ad on a billboard on Liberty Street.
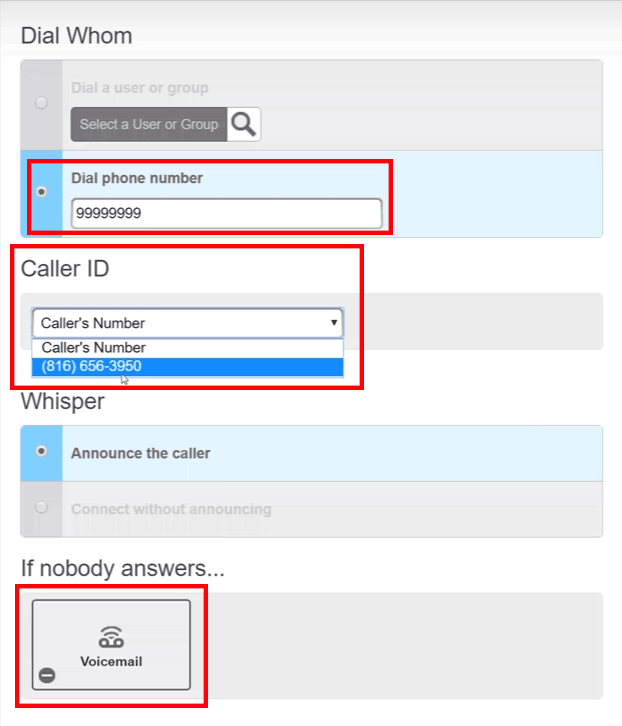
You can then set how the call is handled if you are unable to answer.
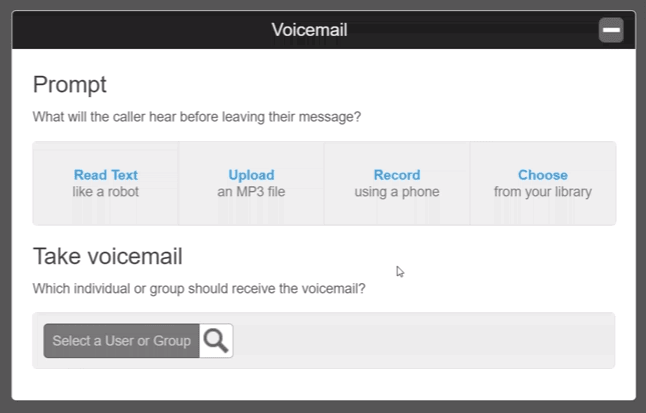
In this example, we chose voicemail which will then allow you to choose various prompt options such as read text, upload an mp3 file, record your voice using a phone, or choose an audio file used previously.
Post Bonus: Get 45% OFF Web Hosting Perfect For OpenXBX