One of the most important tools we have as Pay Per Call marketers is call tracking.
What is call tracking you ask?
As the name suggests it allows you to see data about the calls you are generating before you send them off to the client or offer.
You see, the less intelligent marketer is going to assume they can save $50 a month by not investing in a call tracking platform.
They’ll think that they can just send their leads directly to the client or offer, without much worry.
What happens when you post your clients number in all of your ads and web properties?
Sounds all great and dandy right?
Sure… until the client decides they don’t want to work with you anymore.
Or what if they start questioning the leads you’re sending, how are you going to defend yourself if you’re sending all the leads directly to their phone number?
Point is you need call tracking.
There are tons of options when it comes to call trackers, what it comes down to is features that you plan on using.
I personally currently use CallRail for all of my Pay Per Call projects, however, if you’re looking to save a little bit of money I suggest using OpenVBX.
CallRail – Call Tracker
At the time of this writing, CallRail currently costs $30/month as the base cost + $1 per local number and $3 per each 800 number.
The good news, unlike OpenVBX, is it’s all hosted on their servers + their feature set is a lot better than other trackers.
To get started you can signup to CallRails 14-day free trial to see if it’s right for you.

Click here to signupFor most of us, the Starter version will be more than enough for us to… get started.
However, as you grow your business it’ll likely be in your best interest to upgrade to the Pro version.
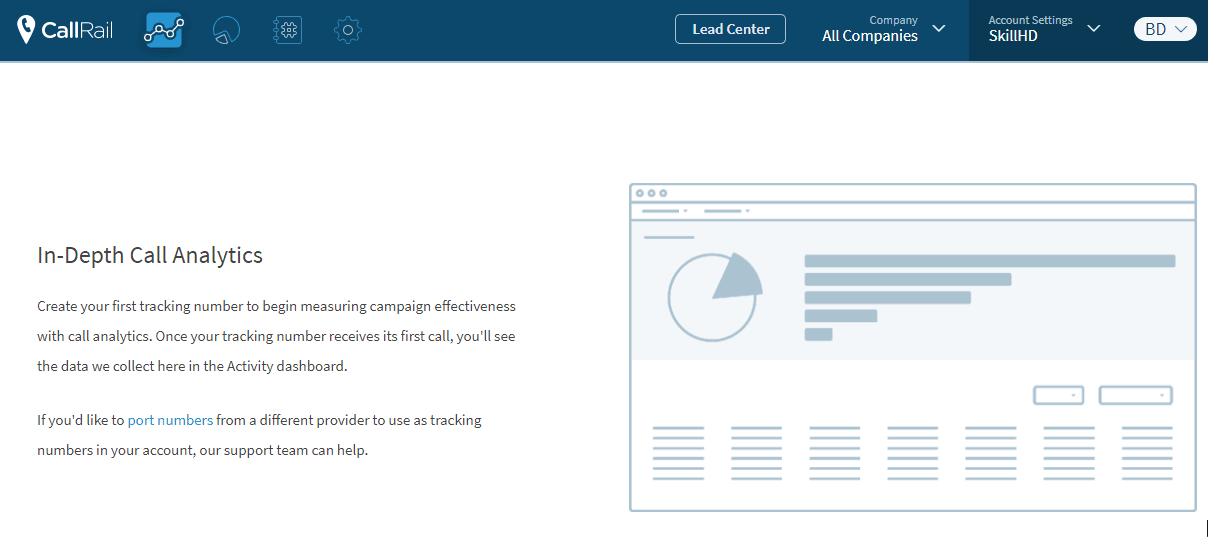
After creating an account, you should be sent to your dashboard which will be empty until we get thing setup.
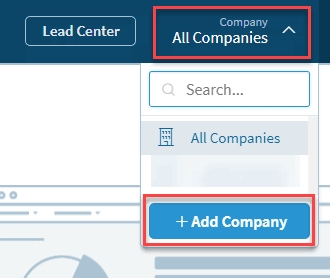 The first thing we’ll want to do inside of our fresh CallRail install is to setup a company. You can do this by clicking on All Companies on the top right of your dashboard then click on the Add Company button.
The company that you will be adding will be your first niche site in this example we’ll be using LodiRoof.com
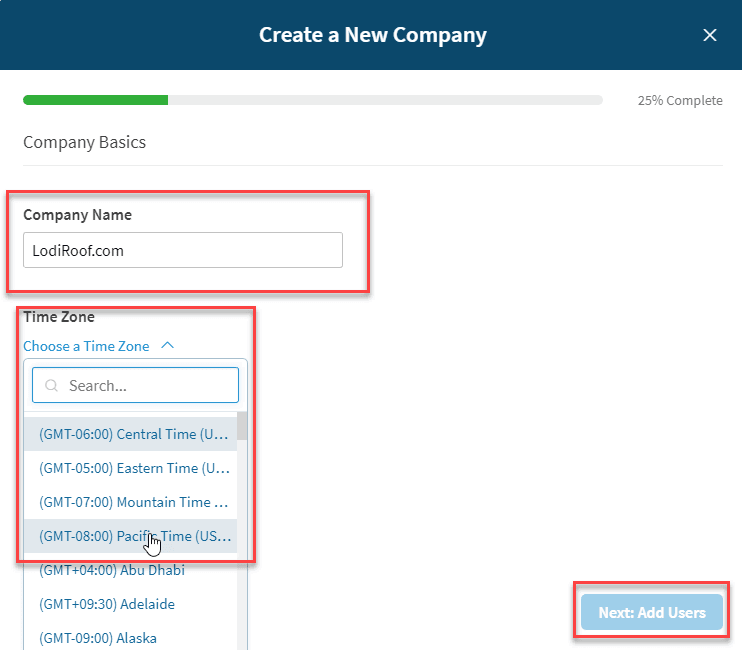
A new dialog will popup ask you for some info about the company. 1) Company Name: I recommend adding the URL of your niche site, so it’s easier to manage as you grow your client base.
2) Time Zone: Select the Time Zone that matches up with the town/city this niche site will be generating leads for.
After filling in this information press on Next: Add Users

You will now be asked to add users to the company. This is useful if you have other partners that you’re working with that need to manage this particular company.
After you’ve selected which users you’d like to have access to this company, press Create Company.
On the next dialog box, simply click on Go to Company Dashboard.
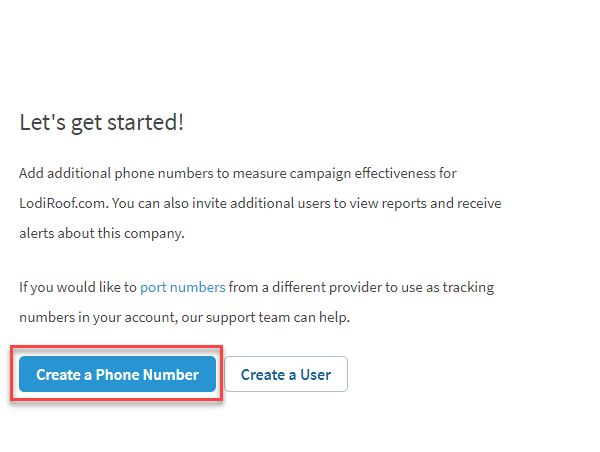
Once you’re back to your newly formed Company Dashboard you should now see Create a Phone Number.
Go ahead and click on Create a Phone Number.

You will now see a new dialog box asking what you’ll be using this new phone number for. Now
It’s more than likely we’ll be using this number within PPC ads or on our lead gen website.
However, this part can be confusing.
If you select Yes, I’ll use it online it will actually create a group of numbers for you, called a ring-pool.
The ring-pool helps you identify the specific ad or placement that the call was generated by.
I suggest, however, that you select No, I’ll use it offline which will create you a single number, for now, to allow you to get used to the system.
You can always create more numbers later if you ever need the extra track capability.
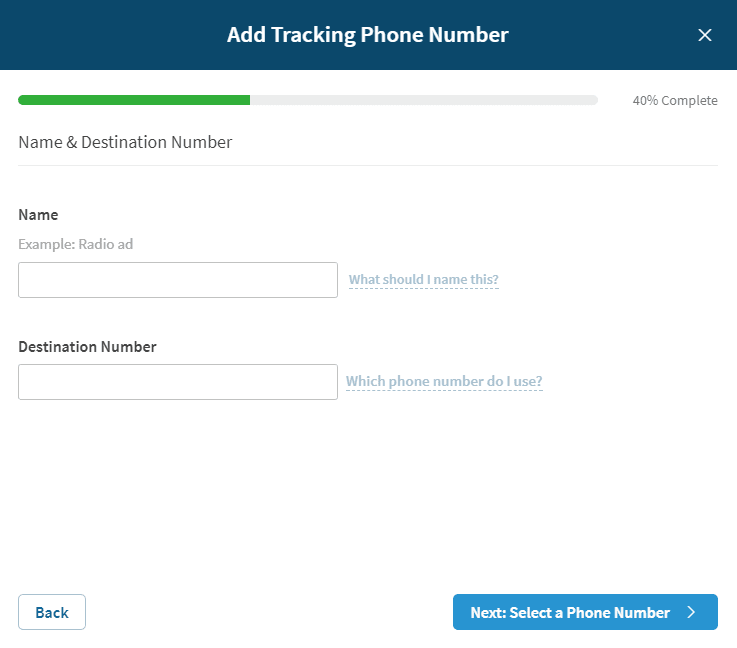
You will now be asked to name this number. If this is going to be the number you use for your website – I would put the domain of your site, if it’s for your Facebook page, put the name of your Facebook page etc.
The Destination Number is much like a call forwarding number.
When someone calls your tracking number it will automatically call the Destination Number.
If you already have a client or offer go ahead and put that number if you don’t feel free to put your cell phone or home phone for now.
After filling in this information, go ahead and click on Nest: Select a Phone Number
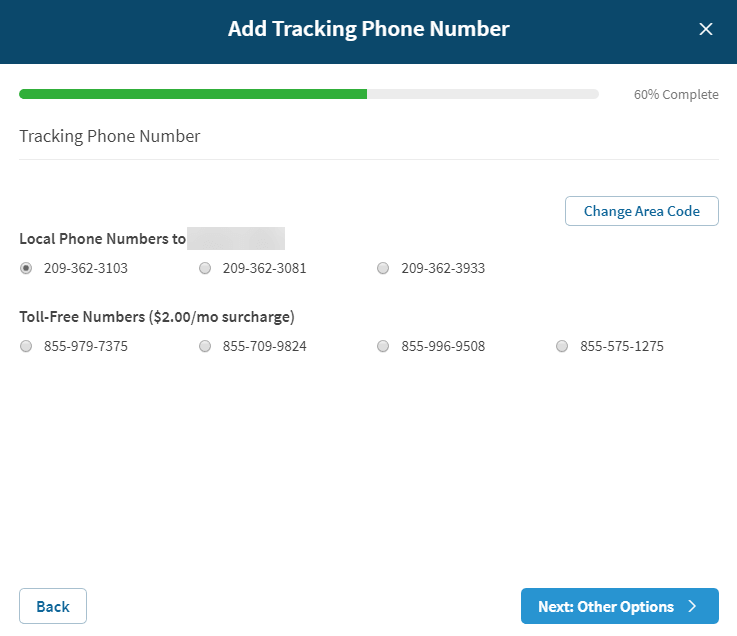
You will now be given a few options. 1) You can select a Local Phone Number which will match the area code of the destination number or you can Change Area Code to match the city that you plan to generate calls in (recommended).
2) Another option is creating a Toll-Free Number which is good if you plan on making a national site but just know that it’s $2/mo extra.
After choosing your Tracking Phone Number go ahead and click Next: Other Options.
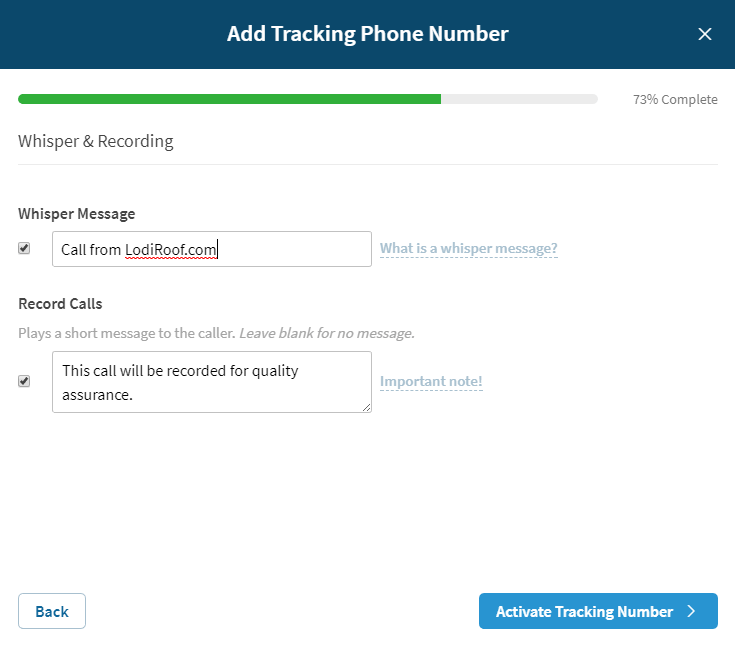
Whisper & Recording
These options are our secrete weapon as Pay Per Call Marketers. 1) Whisper Message: This is a message that will be heard by whoever answers the Destination Phone Number when the call is sent from this tracking number.
This is seriously powerful because it lets your client know the call is from you.
Or for you ninjas out there, it can even be used as a client lead gen tool.
What do I mean? Imagine sending free phone calls to a potential client, when they answer the phone they will hear your Whisper Message then have a live customer on the phone.
If your Whisper Message is “Call from LodiRoof.com” for example, they’ll likely visit your site to see where these leads are coming from and they may even contact YOU.
2) Record Calls: Recording your phone calls that you generate is a game changer.
It not only allows you to defend yourself if a client claims you haven’t been sending quality calls.
But it also allows you to optimize your messaging in your ads and website if you hear people asking the same question over and over.
After you select both of these options and write whichever messages you want them to say, go ahead and click Activate Phone Number then click Go to Activity Dashboard.
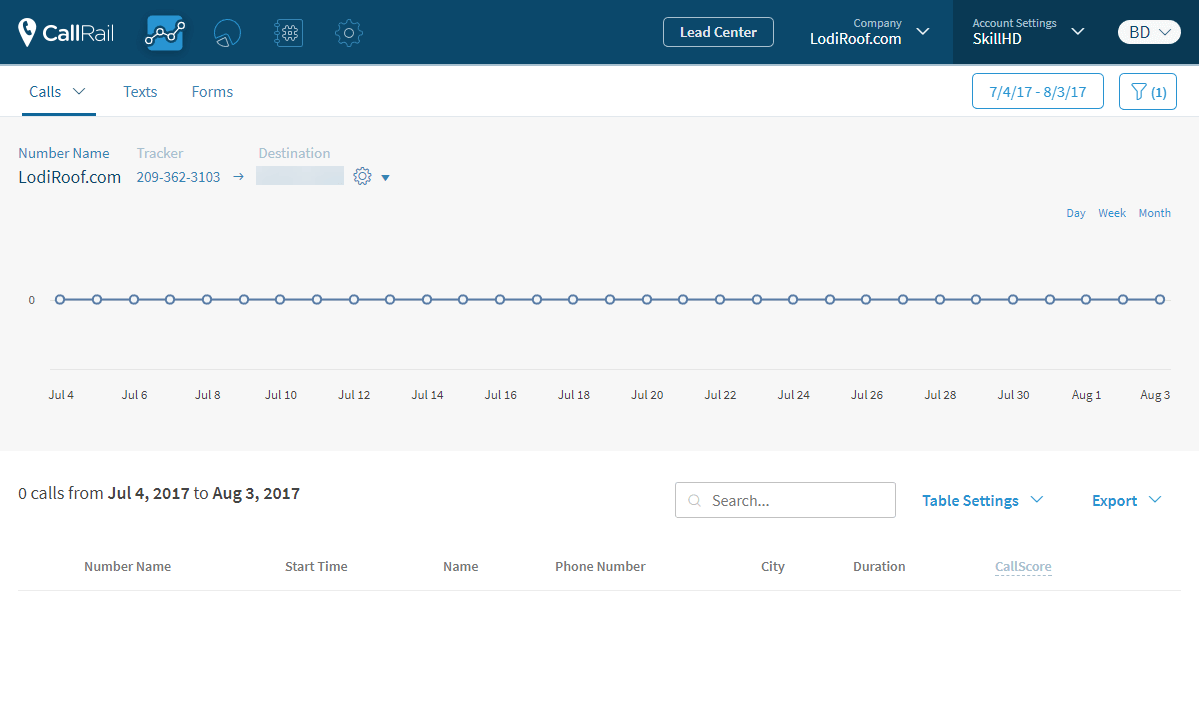
You will then be brought to your Activity Dashboard for the company you currently have selected.
As you can see the graph is blank because there are no calls that have been generated yet.
Once you start to promote your new Tracking Number and you begin to generate calls you’ll begin to see information about the calls.
*** Feel free to call your own tracking number, to see what happens on the dashboard. ***

I went ahead and called my new tracking number to show you what it will look like once you start generating calls.
Not only will it show which one number was called, but it will show you the name of the caller, their phone number, city & duration of the call if answered.
But wait! There’s more (Imagining Billy Mays voice).
Call Flows
CallRail becomes even more powerful for us with the ability to make Call Flows.
I could try explaining all the features, but it will actually be much easier to just show you.
So let’s dive in!

To create a call flow, you’ll first want to click on the Numbers menu item up at the top and make sure you’re selecting the company who will be using the call flow.
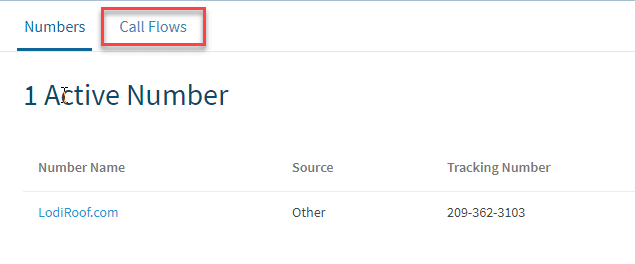
You should be brought to a list of your Active Numbers.
Above the active numbers, you should see a menu item called Call Flows click it.
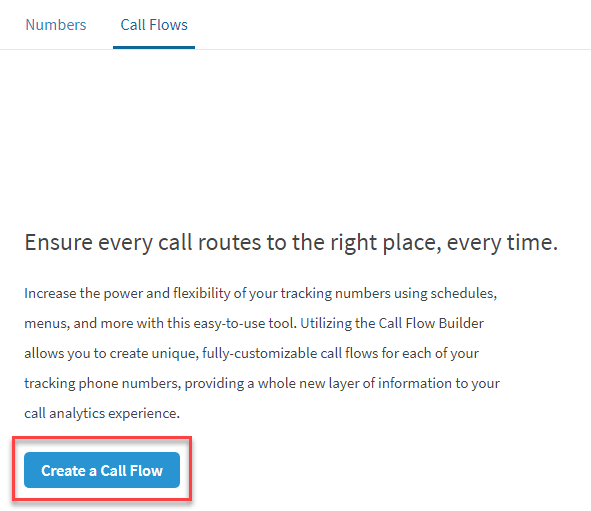 You’re no in the Call Flow dashboard, which if this is your first call flow, will be empty. Click on Create a Call Flow.

Once in the call flow creation screen, be sure to fire name your call flow. In this example, I’m going to be using this call flow, only for calls who are interested in roofing.
So for ease of use I would name it LodiRoof.com
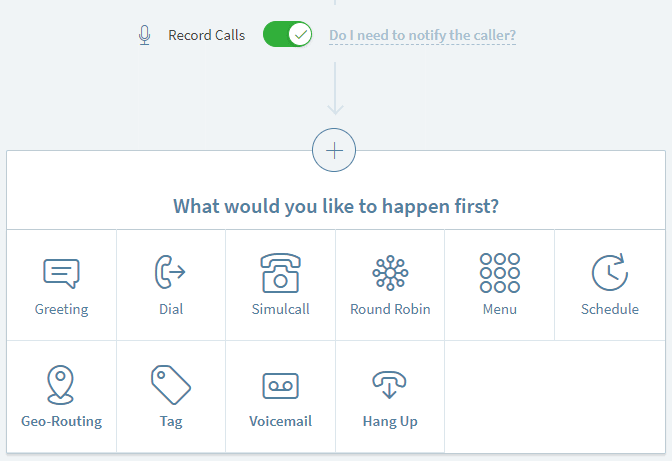
Greeting: Plays a greeting to the caller
Dial: Forward the call to a specific phone number
Simulcall: Ring multiple phones at once (Powerful!)
Round Robin: Evenly distribute calls to multiple phone numbers
Menu: Interactive phone menu aka interactive voice response (IVR)
Schedule: Define time-of-day routing
Geo-Routing: Route based on caller’s location (IVR based on zipcode)
Tag: You can tag people who call, based on different preferences
Voicemail: Send call to your Callrail voicemail
Hang Up: I never use this 😉 but it ends the call ## Call Flow Setup
I’ll now go through an example call flow that I would build out for one of my sites.
Greeting
If you plan on recording calls, you NEED a greeting that informs the caller that the call will be recorded.
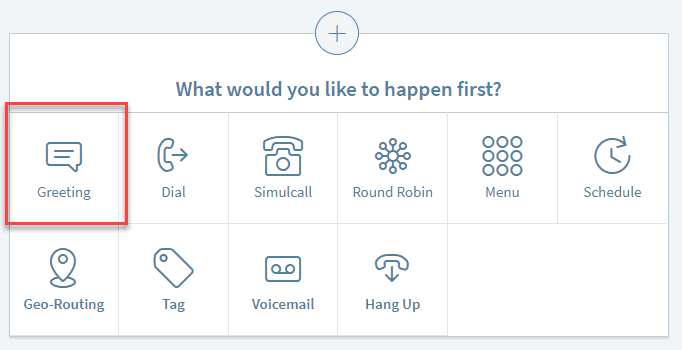 To create a greeting first select the greeting option under What would you like to happen first?
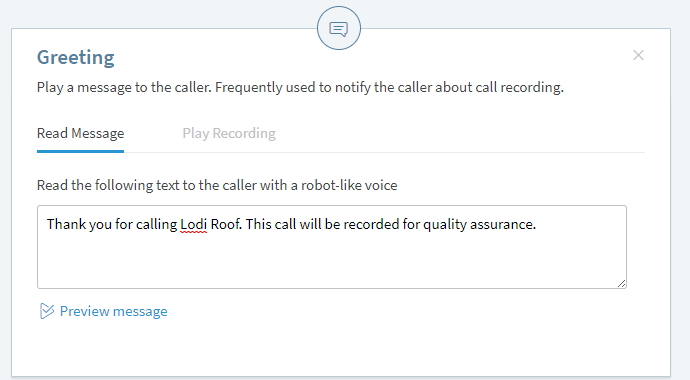 A dialog to setup your greeting will appear with two options. 1) Write in your greeting in text and have a robotic-voice read the message to the caller.
2) Pre-record your own greeting that will automatically play each time someone calls your number.
I personally like to first thank the person for calling my site name.
This lets them know that they’re calling the correct place and then mention the call may be recorded.
 After the greeting, I like to pre-qualify my callers prior to determining where I am going to send the call.
 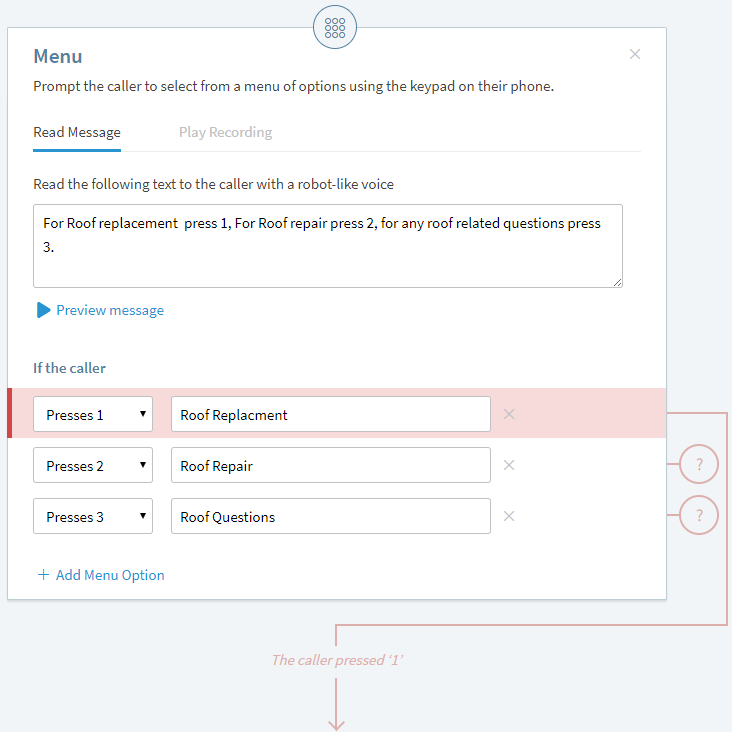 To do this select the menu option for the next step in your call flow. Much like your greeting, you’ll have the option of having a robotic voice read your message or pre-record your own.
Make sure that your message informs the caller what to press and what will happen if they do.
You must also make sure that you match the key press menu with your recording.
From here on out, you’ll need to create the next steps in your call flow, for each key press.
 Next, we’ll want to setup the rest of the call flow if someone presses 1. Now when you look at what you would like to do next, it specifics that it’s only if the caller does a specific key press.
I like to Tag callers based on what they select before doing anything else.
 To create your first tag, simply click on Apply Tags to bring up your tag dialog. Next click on Create New Tag.
You will now be able to name your new tag, I personally will name the tag Roof Replacement then click enter.
 Now every time someone calls my tracking number and selects 1, they will be tagged as roof replacement. This will help me with quality and optimization of both my call flow and traffic generation methods later on down the road.
 There is one final option I suggest you always use: Geo-Routing.
Geo-Routing is awesome because it allows you to have the caller enter a zip code of where they need the service done. If your local clients work within a certain area of that zip code, you can send them the call.
However
When someone calls in that isn’t within your client’s service area, you can send the caller to a failover the offer.
What is a failover offer Brent?
In this example, we can send any caller that doesn’t match our client service area to either A: A roofing affiliate offer or B: sell the lead to a fellow RingMaster who may service that area.
This allows you to never lose revenue on a call.